Custom Node Tool
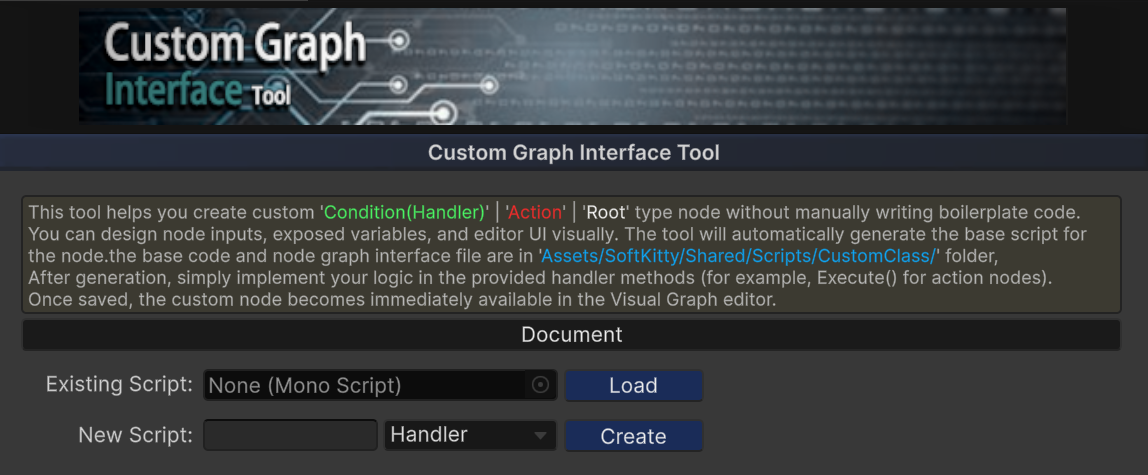
The Custom Node Tool is a visual editor for creating custom node types without manually writing boilerplate code. It is designed to make extension development fast, safe, and approachable.
The tool supports three node categories:
- Root Node
- Condition Node
- Action Node
Note:
All built-in nodes provided by Master Combat Core are created using this tool.
Accessing the Tool
Open the Custom Node Tool via:
Window > Soft Kitty > Custom Graph Interface Tool
Getting Started
Create a New Node
- Enter your node type name in the New Script field.
- Select the node category from the dropdown.
- Click Create.
- Wait for Unity to finish recompiling scripts.
Modify an Existing Node
-
Drag an existing node script into the Existing Script slot.
-
Click Load to edit its interface and regenerate code.
Note:
Modifying an existing custom node interface will overwrite the generated code.
Any custom logic you added to the generated script may be lost.
Please make sure to back up your code before clicking 'Overwrite Code' button.
Node Interface Design
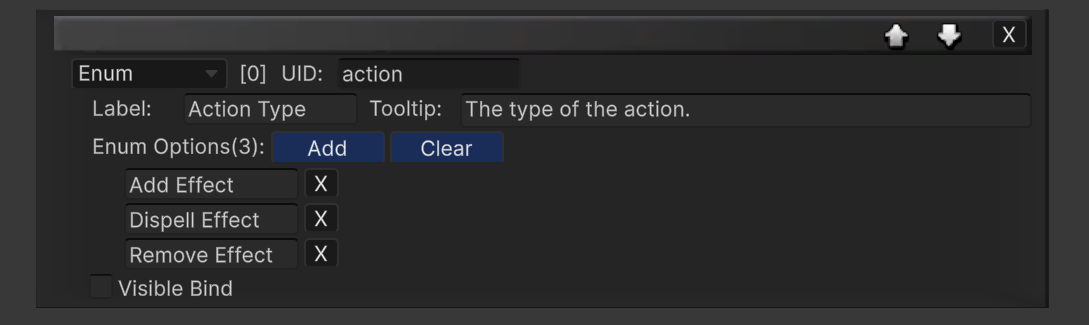
Under the Design section, you can add interface elements using the Create New Element dropdown.
Available Element Types
| Type Name | Usage | Visible Bindable |
|---|---|---|
| Bool Variable | Toggle field for bool values | ✓ |
| String Variable | Text field for string values | ✗ |
| Float Variable | Float input field | ✗ |
| Int Variable | Integer input field | ✗ |
| Input Float | Input port for float values | ✗ |
| Input Entity | Input port for Entity reference | ✗ |
| Enum | Dropdown enum for int values | ✓ |
| Label | Static label text | ✗ |
| Separater | Visual divider line | ✗ |
You can add any number of elements to a node.

Element Properties
Each element contains the following properties:
-
UID A unique identifier. This is also used as the variable name in code.
-
Label The text displayed in the node interface.
-
Tooltip A mouse-hover description shown in the Graph Editor.
-
Visible Bind Allows this element’s visibility to be controlled by another Visible Bindable element (such as Bool or Enum).
Preview & Code Generation
Interface Preview
After finishing the design:
-
The Preview section shows how the node will appear in the Graph Editor
-
The preview is fully interactive
-
Visibility bindings and dropdown behavior can be tested live

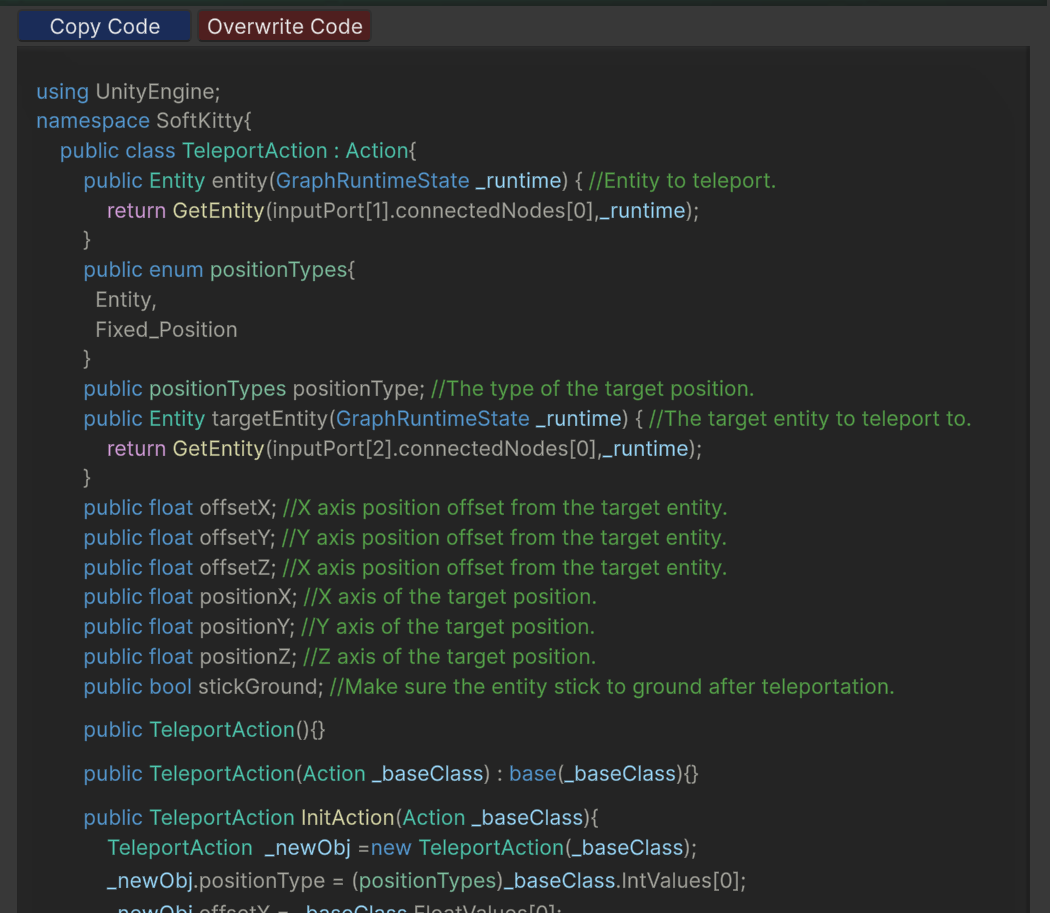
Code Generation
The Code section automatically generates:
-
Variable accessors
-
Initialization logic
-
Base class structure
Click Overwrite Code to generate or update the node script.
Writing Node Logic
After generation, open the created script and implement the node logic.
Condition Node
📁 Assets/SoftKitty/Shared/Scripts/CustomClass/Handler/
public override void Update(GraphRuntimeState _runtime)
{
    // Put your condition logic here
    bool result = /* calculation */;
    SetActive(result);
}
Action Node
📁 Assets/SoftKitty/Shared/Scripts/CustomClass/Action/
public override void Execute(GraphRuntimeState _runtime)
{
    // Put your execution logic here
}
Root Node
📁 Assets/SoftKitty/Shared/Scripts/CustomClass/Root/
public override void StructureBuild()
{
    // Put your root logic here
}
Accessing Custom Variables in Code
To access a variable created in the interface, simply call it using its UID:
intensity(_runtime) = 10f;
This works for:
-
Variables
-
Input values
-
Enums
-
Entity references
Why This Tool Matters
-
No manual editor scripting required
-
No repetitive boilerplate code
-
Consistent UI and runtime behavior
-
Safe, designer-friendly extensibility
-
Scales cleanly with large projects