Installation
- Download the package from
Package Managerand clickImport to Project.
- In the
Projectwindow, navigate to:Assets/SoftKitty/MasterCombatCore/Demo/
- Import the demo package that matches your project’s
Render Pipeline:HDRP_Demo.packageURP_Demo.packageBuilt-In_Demo.package
Note:
Please import only one of above packages.
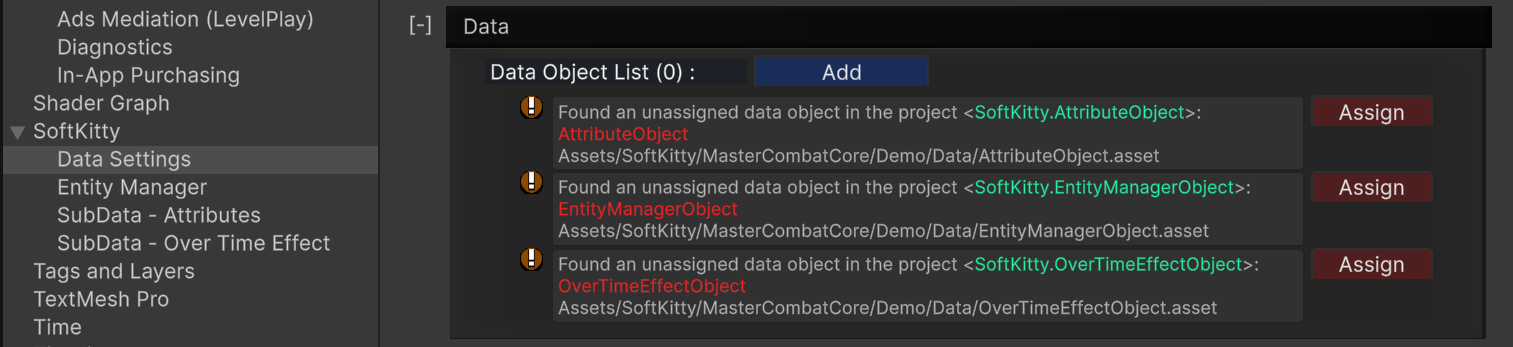
- Go to:
Project Settings > SoftKitty > Data Settingsand expand theDatasection. Click theAssignbuttons of all the demo database objects to add them to your project.
- Open the
demo scenelocated at:Assets/SoftKitty/MasterCombatCore/Demo/Scenes/DemoScene.unity- Verify that the demo runs as expected.
- In the
demo scene, locate the GameObject named<<<<Demo Introduction>>> (Click Me!)- Select it to view a detailed walkthrough in the
Inspector.
- In your project, create the following data assets:
Create → SoftKitty → Data Objects → General Settings DataCreate → SoftKitty → Data Objects → Entity Manager DataCreate → SoftKitty → Data Objects → Attributes DataCreate → SoftKitty → Data Objects → Over Time Effect Data
- Open
Project Settings → SoftKittyand drag the newly createdGeneral Settings Dataasset into theCurrent Settingsfield, replacing the demo settings.
- Navigate to
Project Settings → SoftKitty → Data Settingsand expand theDatatab.
- Replace the following data assets with your newly created assets:
Entity Manager DataAttributes DataOver Time Effect Data
- The system is now ready for your project. You can start exploring the data settings and adding
attributes,over-time effects, andentitiesto the database.
Core Concepts
EntityManagerObject | Entity | EntityComponent
AttributeObject | Attribute | AttributeData | TempAttribute
OverTimeEffectObject | OverTimeEffect | OverTimeEffectData