Getting Started
- First of all, make sure you have Unity UI Canvas in your scene. Navigate to
Project Settings/SoftKitty/Data Settingsand setup the following databse:- ItemObject, refer to the Item Database Settings
- AttributeObject
- EntityManagerObject
- Add EntityComponent component to of your player game object. This component is an interface of the Entity data, which manages Attributes, Items, OverTimeEffects and other CustomData of your characters/crates.
- (Optional) Drag the ActionBar prefab from the
Assets/SoftKitty/InventoryEngine/Prefabsfolder and place it under your UI Canvas transform. This prefab provides 10 shortcut slots with customizable key bindings for items/skills on each page, and you can set up as many pages as needed for players to switch between. The action bar also includes a progress bar at the bottom, which can be configured as a player XP bar to display experience and level, or as a player health bar. Alternatively, you can hide this bar using its UiStyle component.
- You can now start testing some basic functions. In your own script, use the following calls:
//to open the player's inventory.
GameManager.GetPlayer().GetModule<InventoryModule>().GetInventory().OpenWindow()`;
//to open the player's equipment UI.
GameManager.GetPlayer().GetModule<InventoryModule>().GetEquipment().OpenWindow()`;
//to open the crafting/enhancing/enchanting/socketing UI.
GameManager.GetPlayer().GetModule<InventoryModule>().GetInventory().OpenForgeWindow(true, true, true, true, 1F,"Forge");
//to open the skill list.
GameManager.GetPlayer().GetModule<InventoryModule>().GetInventory().OpenWindowByName("Skills", "Skills")`;
- Now, let's add some more interesting functions. Add an Entity in EntityManagerObject from the
Project Settings/SoftKitty/Entity Manager, input its uid as MerchantNPC, add a new 'Inventory' to it and select theTypeasMerchant:
- Let's add a few items to him, and setup the
Price Multiplier, make sureAccept all tradeable itemsis checked. Don't forget add some currencies to him, otherwise he would not be able to purchase player's goods.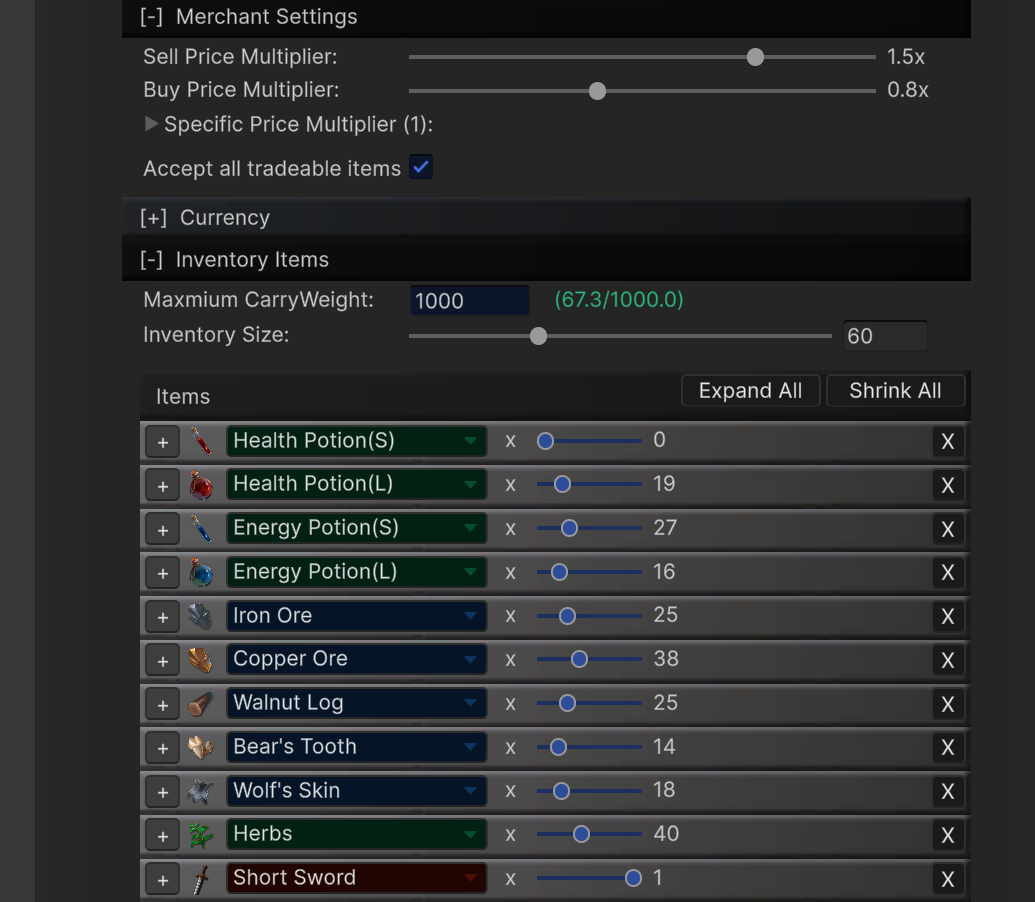
- Now in your script, whenever you want to open the store, simply call:
GameManager.GetEntity("MerchantNPC").GetModule<InventoryModule>().GetInventory().OpenWindow();
Alternatively, you can add a EntityComponent to one of your NPC character, select its UID as MerchantNPC. When your player interact with it, call:
myNPC.GetComponent<EntityComponent>().GetModule<InventoryModule>().GetInventory().OpenWindow();
- You can create Entity in database for any object in your game. When the player interacts with it, call
OpenWindow()to open the corresponding interface. The specific interface that appears depends on the Type setting of the InventoryData. In steps 4 and 5, we tested most types of InventoryData. Now, let's test the last one. Create an Entity and set itsInventorytype asCrate. When the player interacts with it, callOpenWindow()to display the crate UI.
- If your game includes Loot Pack that players can obtain from defeating monsters or completing quests, you can use the Loot Pack Settings in Project Settings/SoftKitty/SubData - Items. After setup the Loot Pack, there're two ways to drop a Loot Pack: Directly drop via uid of the Loot Pack:
var _loot = ItemObject.DropLootPack(Vector3.zero, "TestLootPack01");//Drop a loot pack from loot packs list.
Add Loot Pack to Entity in the [Entity Manager], the call:
var _loot = GameManager.GetEntity("Monster01").GetModule<InventoryModule>().DropLootPack(); //Drop a loot pack from an entity.
//or
var _loot = GameManager.GetEntityInstance("Monster01").GetModule<InventoryModule>().DropLootPack(); //Drop a loot pack from an entity instance.
When the player interacts with the Loot Pack, call _loot.OpenPack() to open the interface and allow the player to collect their rewards.
- Check
MainMenu.csin Assets/SoftKitty/InventoryEngine/ExampleScene/Scripts to learn how to setup Callbacks for player uses, equips, or unequips an item. You can also learn how to save/load data, assign crafting tasks to NPCs, and manage NPC equipment and inventory.
- Now that we've walked through all the pre-made interfaces, you can easily create your own by customizing the existing prefabs in the Assets/SoftKitty/InventoryEngine/Resources/InventoryEngine/UiWindows folder. Adjust the settings in the UiStyle component on each prefab to suit your needs. Alternatively, you can write your own script by inheriting from
ItemContainer.cs,ContainerBase.cs, orHiddenContainer.cs.