Customization Textures
Customization textures include details like lips, eyes, eyebrows, makeup, tattoos, etc. To create new customization textures, you’ll need basic skills in image editing software like Photoshop or similar tools.
-
Locate the corresponding UV layout images in the
SoftKitty/MasterCharacterCreator/ArtSource/UV/folder and open them inPhotoshop. Create your new texture based on the UV layout. You can refer to the existing textures in theSoftKitty/MasterCharacterCreator/Resources/MasterCharacterCreator/Player/folder. Ensure the texture is in grayscale, and adjust the brightness to be as bright as possible for optimal results. Make sure the background is transparent.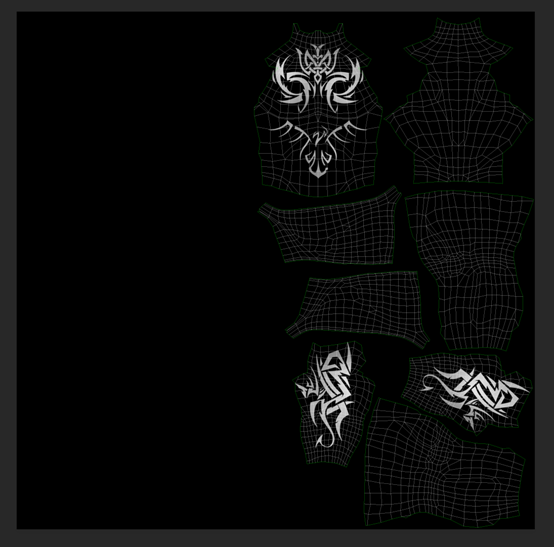
-
Save your new texture as a
PNGfile and place it into your project folder. In the Inspector, adjust theTexture Import Settings: checkAlpha is Transparency, uncheckGenerate Mip Maps, setWrap ModetoClamp, and click theApplybutton.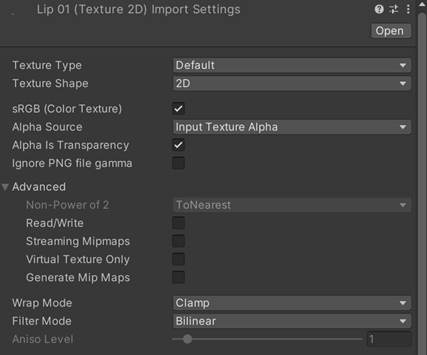
-
Navigate to
Project/SoftKitty/SubData - Character Customization, expand theAdd new body customizationssection in the Inspector. Choose the corresponding type of this item, and assign the texture to the texture slot. Ensure the correctGenderof the character is selected, then click theAddbutton to proceed.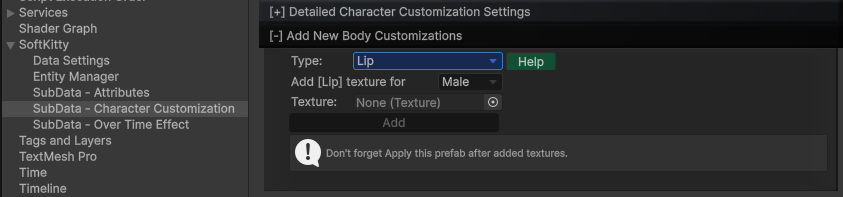
- It's done! Your new texture should now appear in the character creator. Don't forget to repeat the same process for the other gender's character model if you want this item to be available for both male and female characters.