Getting Started
- First of all, Navigate to
Project Settings/SoftKitty/Data Settingsand setup the following databse:
-
Before we get started, please take a look at the demo scene located at :
SoftKitty/MasterCharacterCreator/Demo/Scene/OutdoorsScene.unityTo run the demo, make sure to add the following scene to your build settings:
-
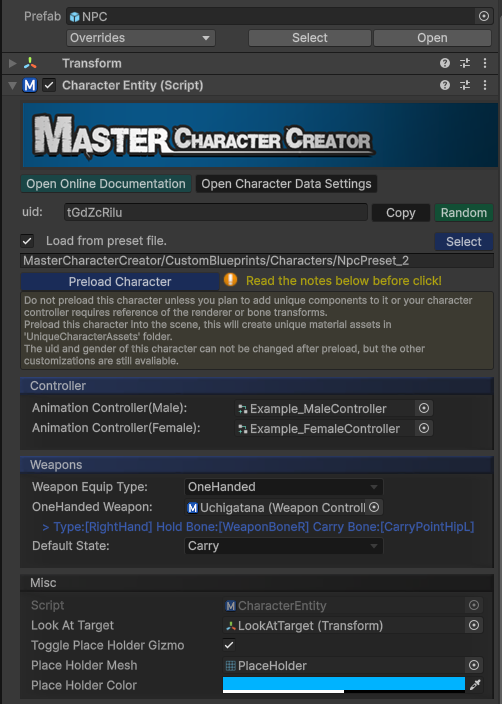
In the demo scene, locate the game object called NPC. It contains a CharacterEntity component, which you'll add to every NPC and the Player in your game. You can also have your character control script inherit from this component.
-
Run the demo scene, and you will notice three buttons on the top left:
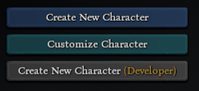
- Create New Character This calls CharacterEntity.CreateCharacter(), which switches to the character creation interface. When a player creates a new character, you can call this function with the character entity you want to create the appearance for.
- Customize Character This calls CharacterEntity.CustomizeCharacter(), switching to the character customization interface. When a player wants to customize a character, you can call this function with the character entity you want to customize.
- Create New Character (Developer) This calls CharacterEntity.CreateCharacterByDeveloper(), which switches to the character creation interface with all outfits unlocked. This is a useful tool for creating NPCs or character presets.
-
To modify the settings of the interfaces mentioned above, locate the Character Customization Settings in
Project Settings/SoftKitty/SubData - Character Customization.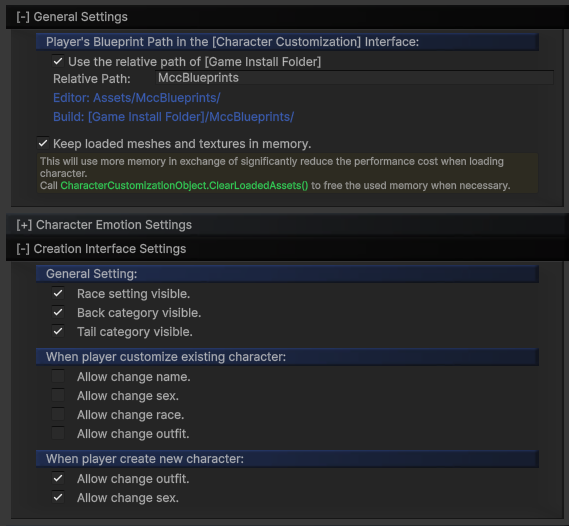
Please note, when a player uses the save/load function in the character customization UI, the data is saved as a
PNGimage of the character's photo, with the appearance data hidden within thePNGfile. This file can only be stored in the path defined by thePlayer Blueprint Pathsetting. However, when in theCreateCharacterByDevelopermode, the appearance data will be saved as abytefile instead of aPNG.
-
On the bottom left of the screen, you'll see some test buttons that demonstrate how equipment in your game can be linked to character appearance.
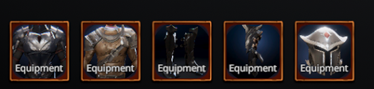
Open the
DemoScript.csscript, and you'll notice it binds the equipment using a class calledEquipmentAppearance. You can easily add this class to your equipment item data. When a player equips an item, simply call CharacterEntity.Equip() with theEquipmentAppearancedata for that item, and the character's appearance will update accordingly.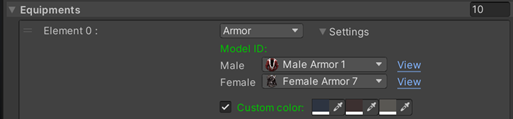
-
With the knowledge from the previous steps, you can already use this system to create NPCs and allow players to customize their own characters. If you want to add more models and textures into the system, please refer to the following documentation:
For more advanced usage of the system, continue reading the following sections of this document.
Working with Other SoftKitty Packages
When using MasterCharacterCreator alongside other SoftKitty packages—such as Master InventoryEnginePro, MasterCombatCore, or MasterMapNavigationSystem — all character customization data is stored within the Entity:
EntityManager
Within the EntityManagerObject, you will notice an additional module under each Entity called CharacterCustomizationModule:
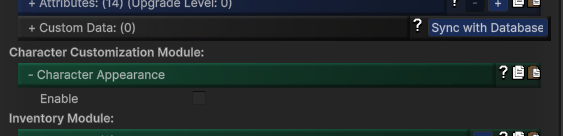
Expand this module to access its interface, then enable the Enable checkbox to activate Character Customization data for the entity. You can create new data by clicking the Create button, or import existing presets by browsing *.bytes files in your project.
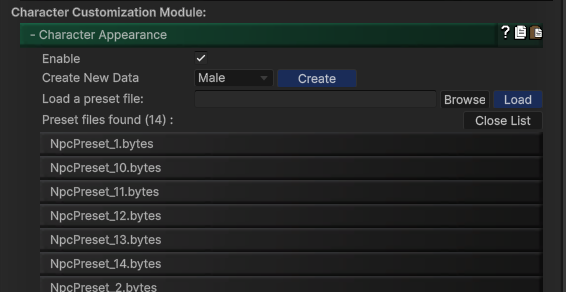
Once the data has been created or assigned, you can access an Entity's Character Customization data using the following code:
Entity _npcEntity = GameManager.GetEntity("TestNPC");
CharacterAppearance _data =  _npcEntity.GetModule<CharacterCustomizationModule>().mCharacterAppearance;
CharacterEntity
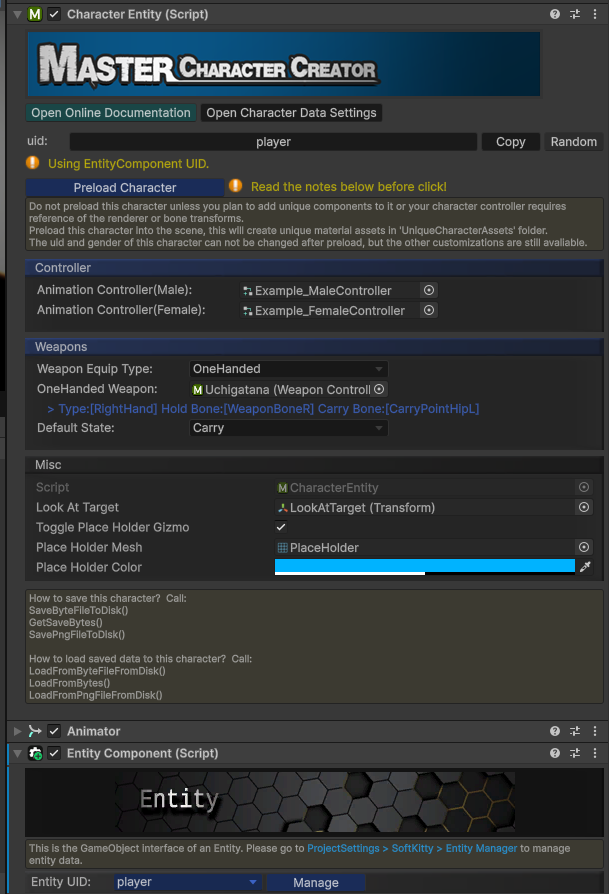
To use the CharacterEntity component with the EntityManagerObject, simply add an EntityComponent to the same GameObject.
Once added, the UID of the CharacterEntity will be synchronized with the UID of the EntityComponent. This allows the CharacterAppearance data to be shared seamlessly between the CharacterEntity and the EntityManagerObject database.
Inventory
When using MasterCharacterCreator together with Master InventoryEnginePro, you will find a section called Master Character Creator Appearance in the item settings:
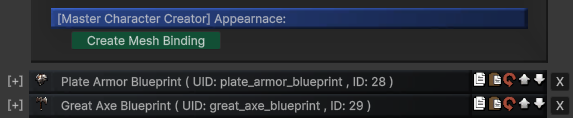
Click Create Mesh Binding to associate an appearance model with the item. You can also customize the model’s color directly within this section:
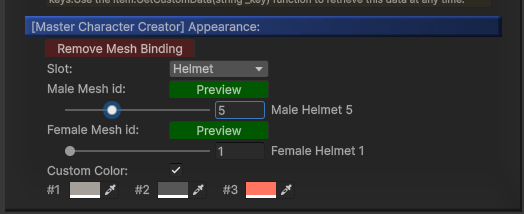
To apply these appearance changes when this item is equipped at runtime, register a callback for equipment changes on the player:
public CharacterEntity Player; //player CharacterEntity component.

void Start(){
   ItemObject.PlayerEquipmentData.RegisterItemChangeCallback(OnEuqipmentItemChange);//Register callback for player's equipment
}

public void OnEuqipmentItemChange(Dictionary<Item, int> _changedItems)
{
   foreach (var _item in _changedItems.Keys) {
      if (Player != null)
      {
         if (_changedItems[_item] > 0)
         {
            Player.Equip(_item.equipAppearance); // Equip the Appearance
         }
         else
         {
            Player.Unequip(_item.equipAppearance.Type); // Unequip the Appearance
         }
      }
   }
}

void OnDestroy(){
   ItemObject.PlayerEquipmentData.UnRegisterItemChangeCallback(OnEuqipmentItemChange);
}