Map Generator
The Map Generator is a powerful tool that converts your 3D scene into a stylized 2D map texture. Below are the key points you need to know to use it effectively:
- Layer Mask: Only GameObjects and Terrain within the Layer Mask set in the
Map Generatorwill be rendered. - Colliders: Only GameObjects and Terrain with colliders will be rendered.
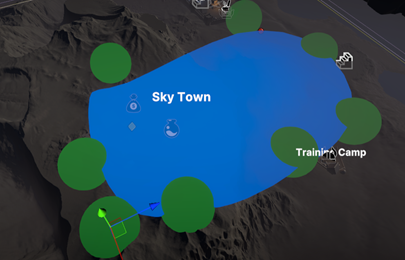
- Render Area: Only objects inside the yellow box defined by the
Map Generatorwill be rendered. The yellow box (render area) is controlled by:- Bottom Left and Top Right transforms.
- Height Range settings.
For multi-layer scenes (e.g., multi-story buildings), you should have multiple Map Generator prefabs in the scene, each corresponding to a specific layer.
![]()
Use the Layer Setting to define the layer of each Map Generator instance and adjust its height range accordingly.
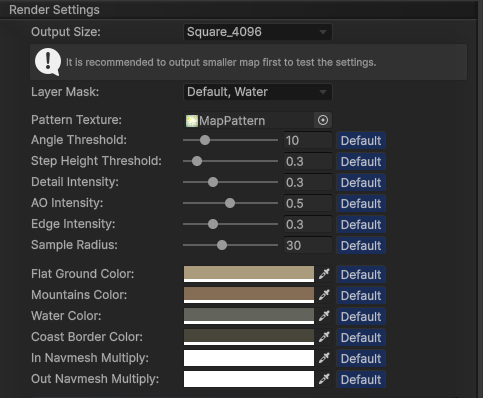
Render Settings
The Map Generator offers various stylization options to customize the appearance of your map. These options are self-explanatory by their name:
Custom Group Color:
-
Setup Custom Groups: You can create multiple
Custom Groupsto filter GameObjects and apply unique colors to them during rendering.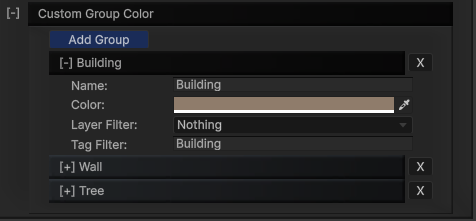
-
Filtering with Tags: If you prefer not to change the layer or tag of your GameObjects, you can use the
MapCreatorTagcomponent.
Add the
MapCreatorTagcomponent to the GameObject and set the desired Tag string. TheMap Generatorwill recognize this tag and apply the appropriate color based on the Custom Group settings. Tip: If you want a GameObject to be treated as water, check the“Water”checkbox in theMapCreatorTagcomponent. -
Ocean
The
OceanGameObject represents the ocean surface for your map. Adjust its size and water level by scaling and moving the transform. -
Lake
The
LakeGameObject can be adjusted to create water bodies like lakes or ponds.- Customize the lake's shape by moving the green nodes around it.
- Duplicate the
LakeGameObject to add multiple lake areas on your map.