First Damage Graph
This guide walks you through creating your first working damage setup using Master Combat Core.
By the end, you will:
-
Understand how a damage graph work
-
Create a simple damage GraphObject
Foundation
Before building the graph, we need to prepare some data.
Step 0 — Setup Attributes
Go to:
Project Settings > SoftKitty > Attributes
Click Add to create the following Attribute::
| Display Name | UID | Default Value |
|---|---|---|
Attack | atk | 5 |
Defense | def | 5 |
Health | hp | 5 |
Step 0.1 — Setup Entities
Go to:
Project Settings > SoftKitty > Entity Manager
Click Add New Entity and create two Entity:
| UID | Tags |
|---|---|
player | friendly |
enemy1 | hostile |
Then expand Batch Management Tools on the top and click Batch Fill Attributes
This assigns all existing attributes to all entities.
Step 1 — Create a Damage Graph
-
Right-click in the Project window
-
Create a Damage Graph asset via:
Create > Soft Kitty > Node Graph Object -
Double-click the asset to open it in the Graph Editor
This graph defines how damage is calculated and applied.
Step 2 — Setup Conditions
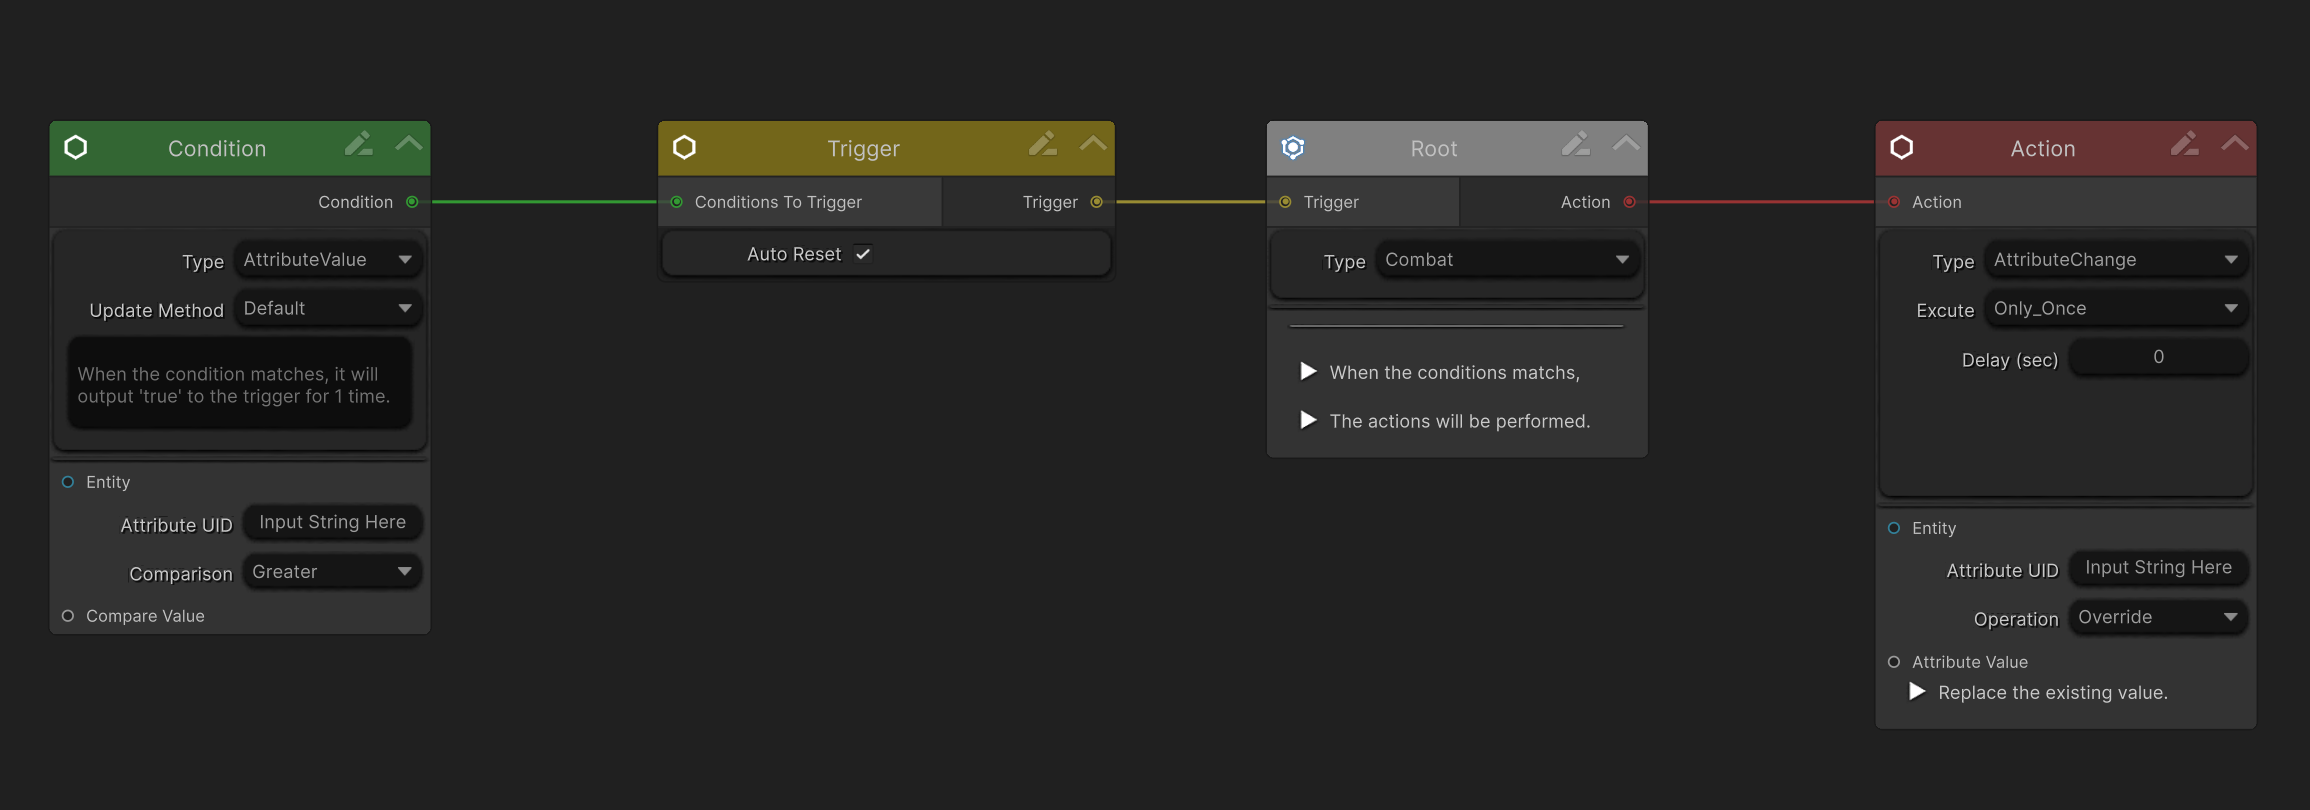
Every damage graph starts with a Root Node.
Root Node / Trigger Node / Action Node Relationship
Trigger Node Controls whether the graph is allowed to execute
Root Node
Acts as the execution gateway
Action Node Performs actual gameplay changes (damage, healing, etc.)
By default, a Root Node, Trigger Node, Condition Node, and Action Node are already created and connected:
Build the Damage Condition
- Create Variable Nodes
- Right-click the graph and select:
Create Node > Variable > Constant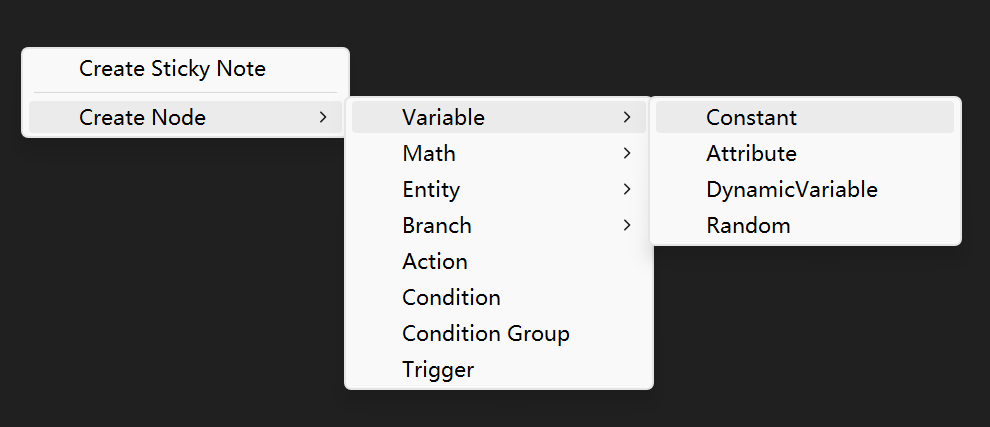 Set the value to
 0.01 - Create another Variable Node:
Type:
AttributeAttribute:def
- Create Math Node
- Right-click the graph:
Create Node > Math > Multiply - Connect:
0.01 Constant→MultiplyADefense Attribute→MultiplyB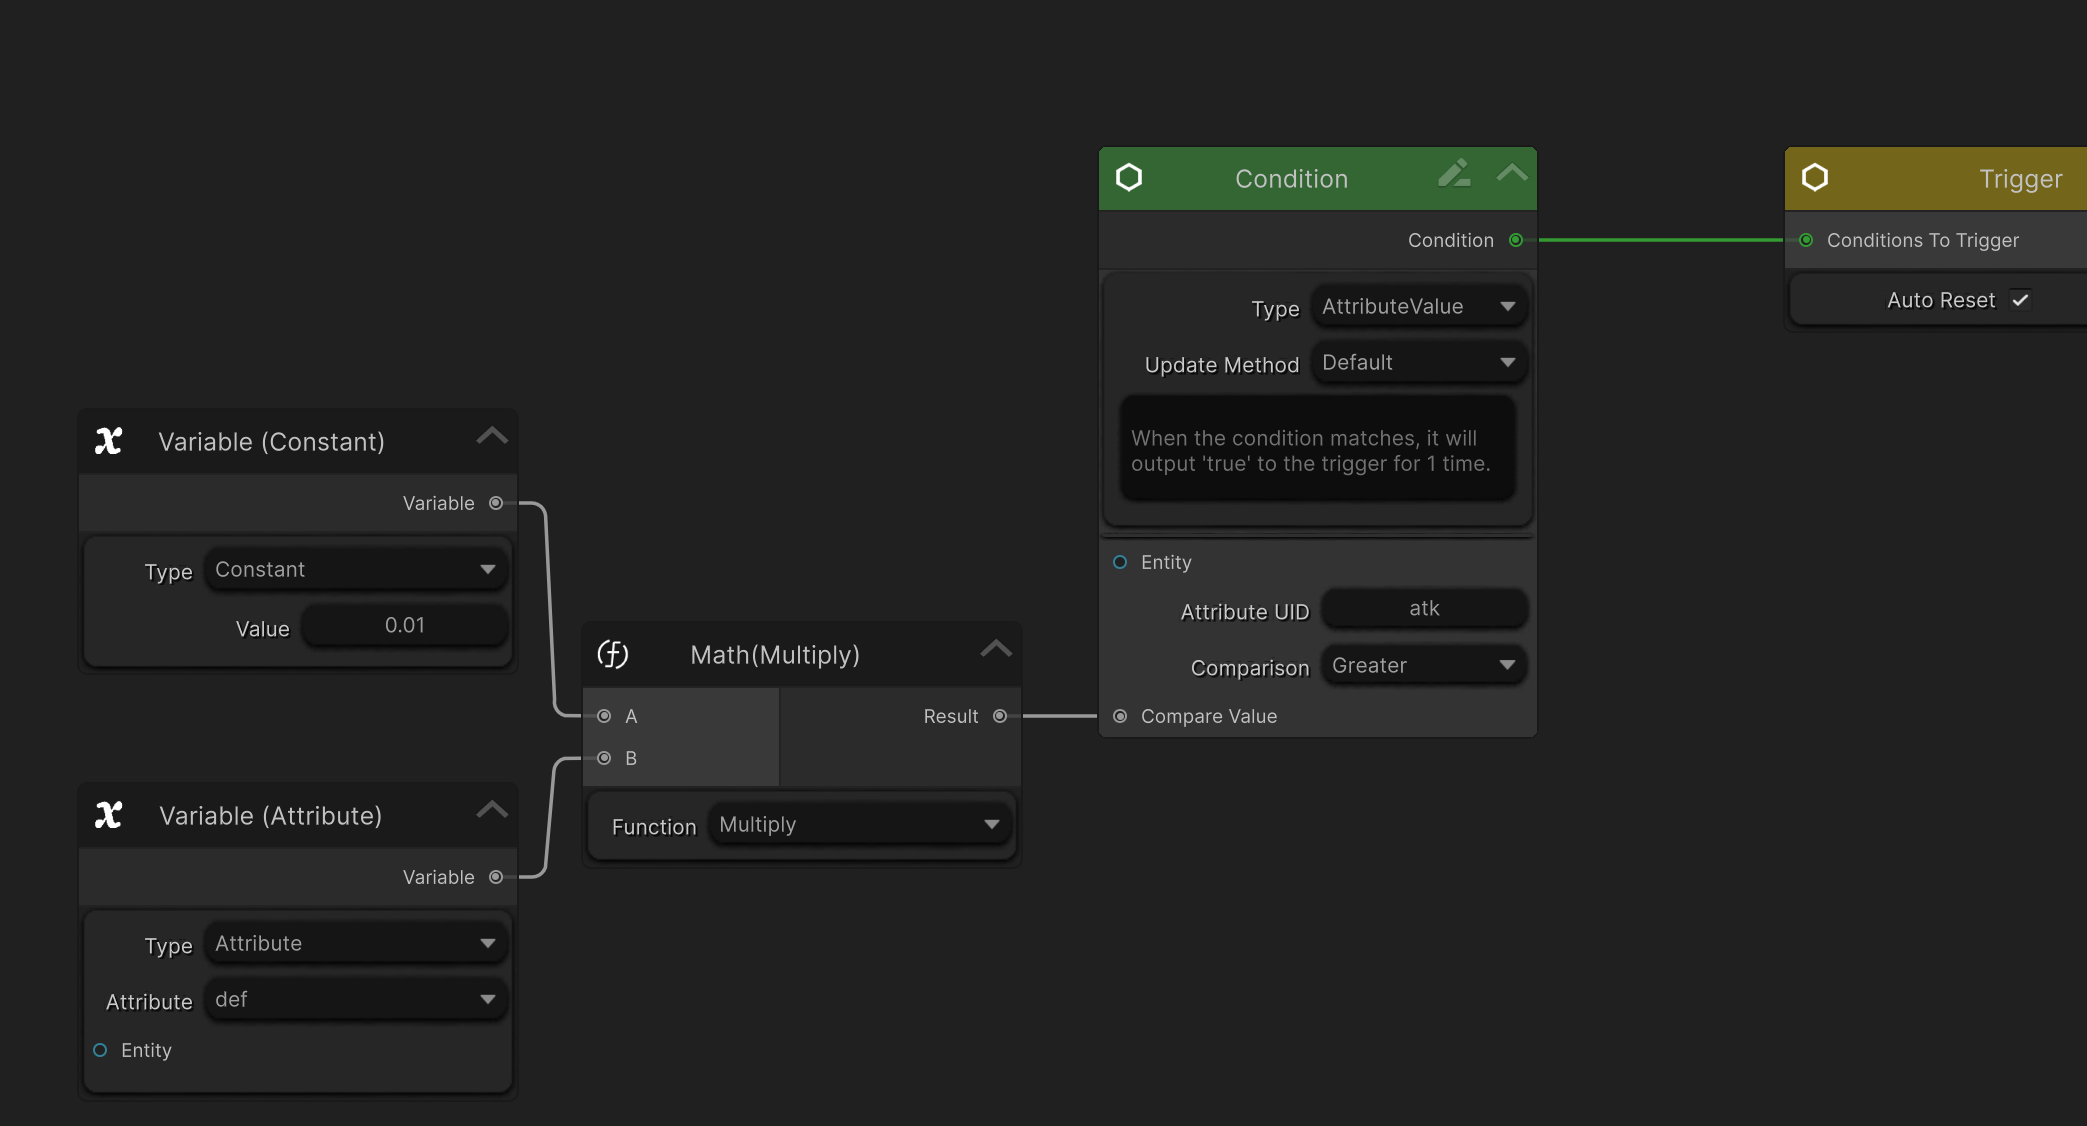
- Configure Condition Node
- Connect the Multiply output into the Condition Node.
- Now create two Entity Nodes:
Create Node > Entity > DealerCreate Node > Entity > Target
- Connect:
Dealer→ Condition Node (Entity input)Target→ Attribute Variable Node (Entity input)
- Your graph should now look like this:
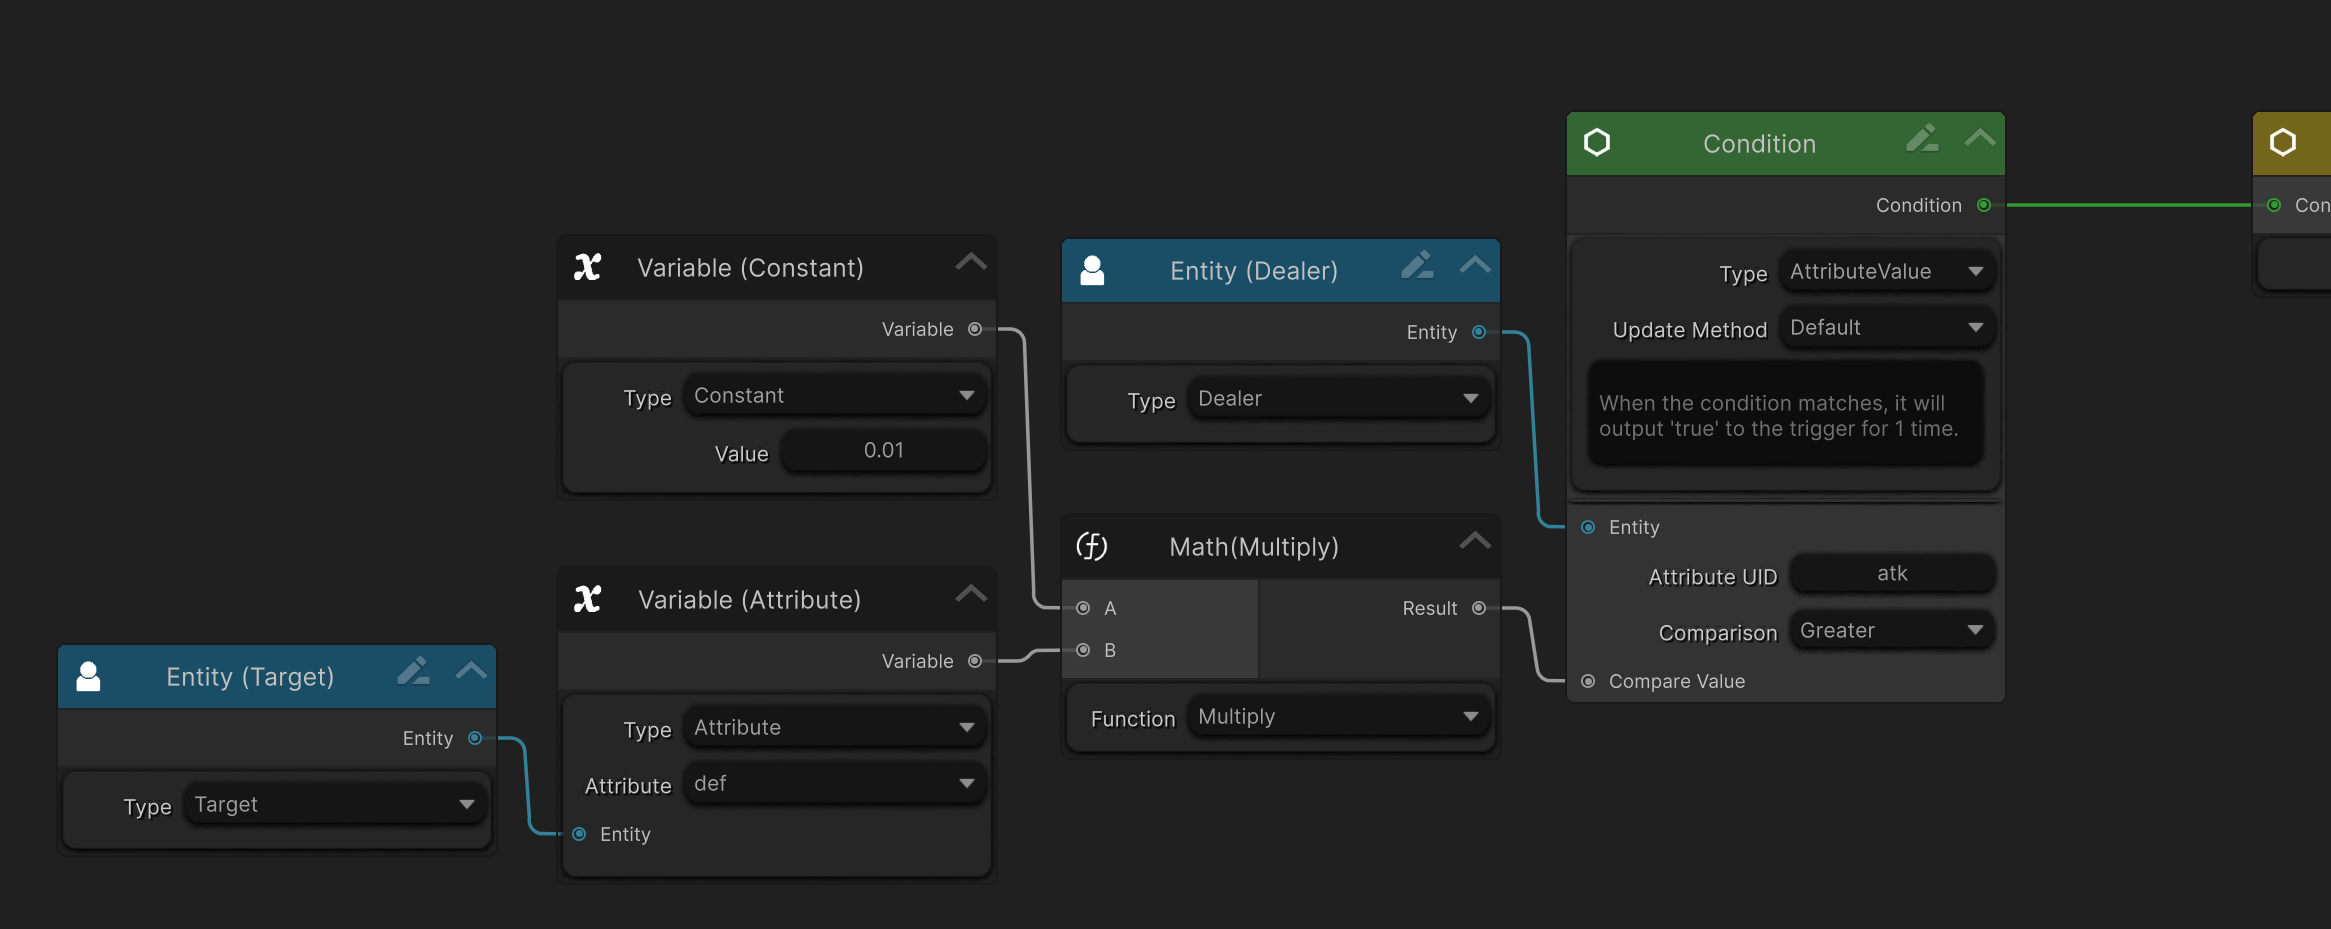
What Does This Condition Mean?
This condition evaluates:
Is the attacker’s `Attack` greater than the target’s `Defense` × 0.01?
If the condition is True, the Root Node will execute all connected Action Nodes.
Step 3 — Setup Actions
Now let’s calculate and apply damage.
We will:
- Subtract Defense × 0.01 from the attacker’s Attack
- Apply the result as damage to the target’s Health
The final graph should look like this:
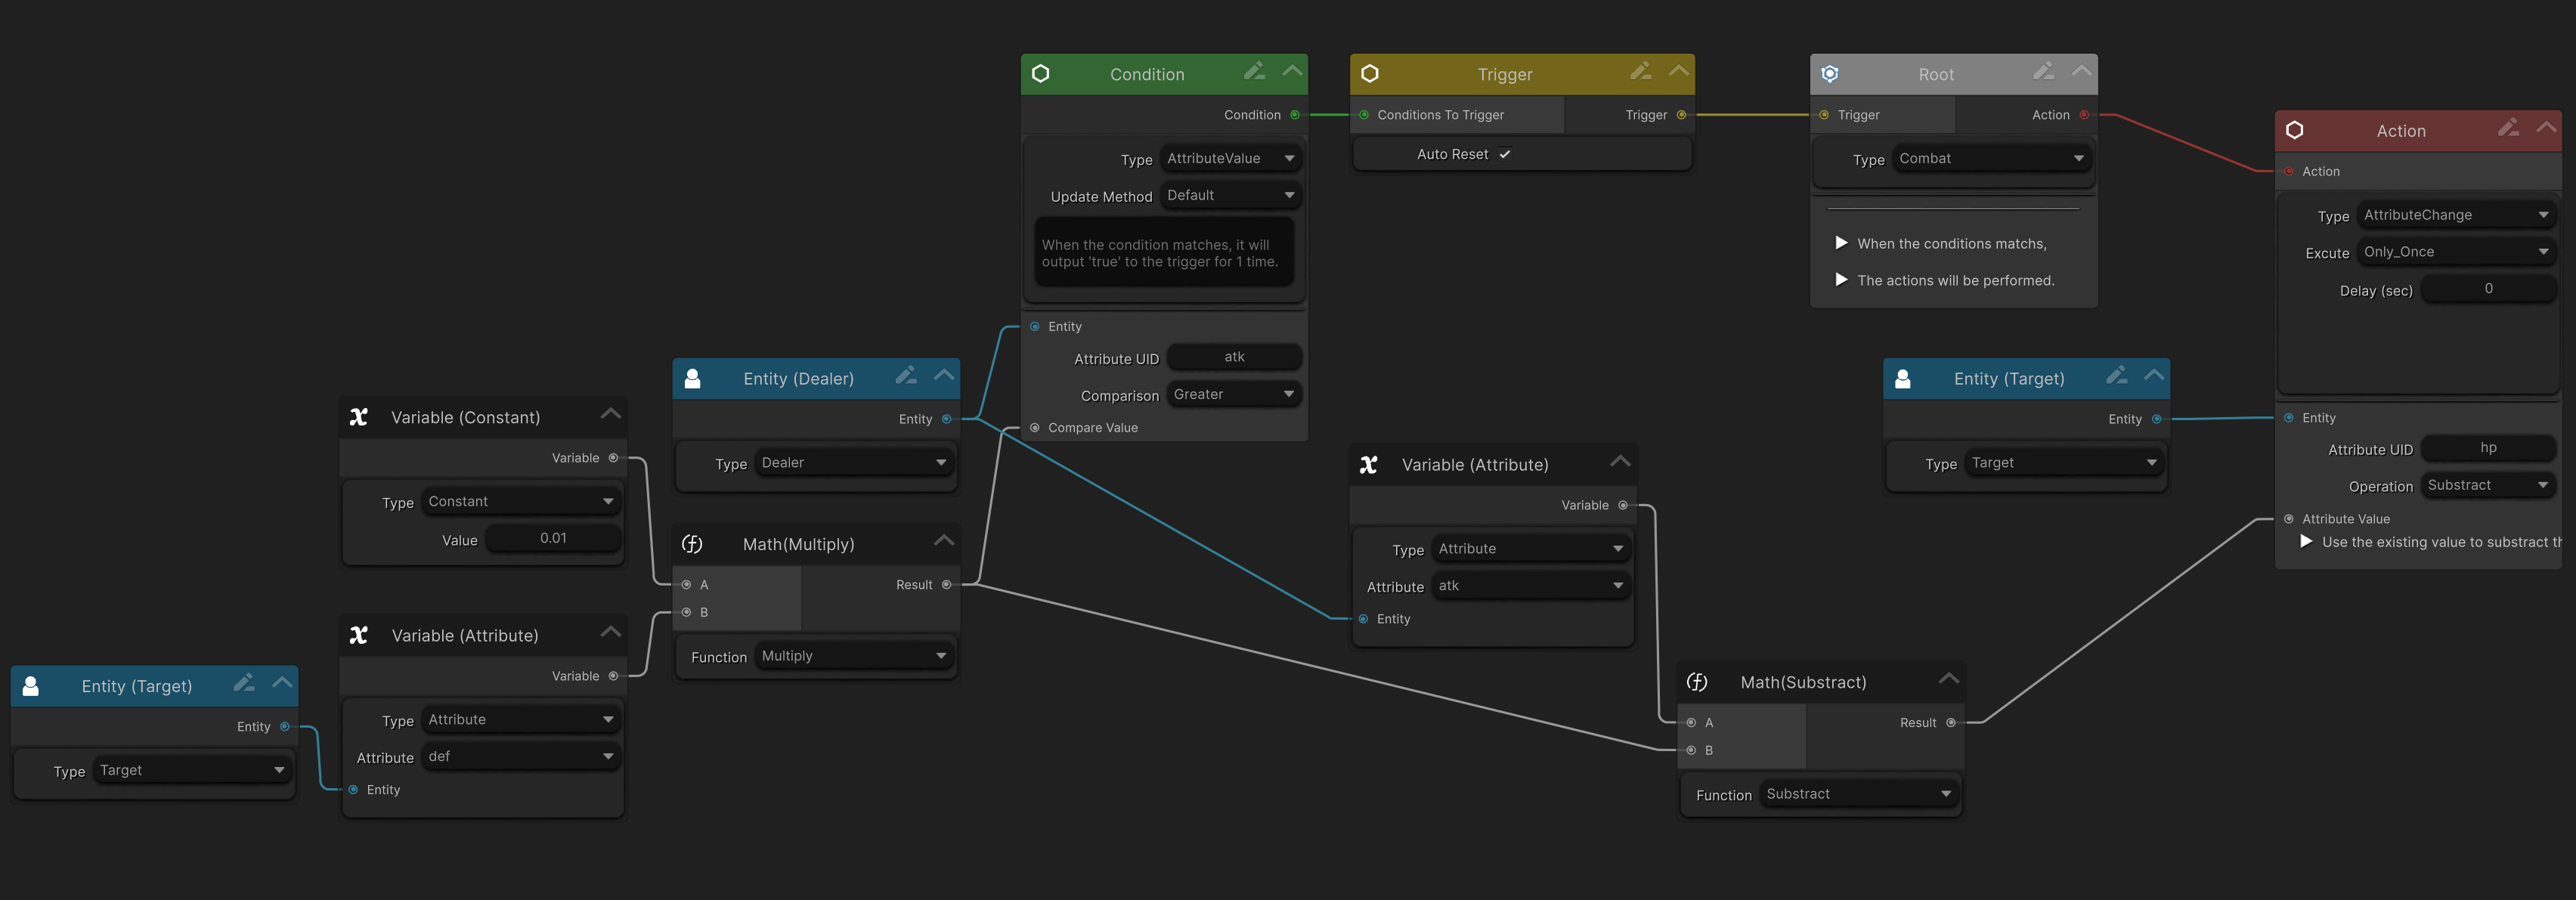
At runtime:
- Damage is calculated
- The target’s Health is reduced accordingly
Step 4 — Grouping & Documentation
To improve readability:
- Select the nodes related to
Defense calculation - Right-click → Group
- Rename the group to
Defense
Then:
- Right-click an empty area
- Select Create Sticky Note
- Right-click the note → Set as Graph Summary
Write a short description. This summary will be visible in the Inspector, even outside the graph editor.
How This GraphObject Works in Gameplay?
This Damage GraphObject can be used by:
- CombatDamage component
- OverTimeEffect
- A custom system inheriting from GraphInstance
Regardless of how it’s used, two runtime inputs are required:
- Dealer — The entity dealing damage
- Target — The entity receiving damage
How to Provide Runtime Inputs
You can:
- Assign them directly in the CombatDamage Inspector
- Let CombatDamage Physics Detection auto-assign targets
- Use OverTimeEffect, which handles both automatically
- Set them manually at runtime via code:
combatDamage.SetDealerEntity(attackerEntity);
combatDamage.SetTargetEntity(victimEntity);
Summary
You have now:
- Created a complete damage graph
- Defined clear conditions
- Calculated and applied damage
- Prepared it for real gameplay usage
This same workflow applies to healing, buffs, debuffs, and custom combat logic.