Managing Weapons
MCC provides user-friendly tools and APIs to manage weapons efficiently. Follow the steps below to integrate your weapon models:
Set Up the Weapon GameObject
Create an empty GameObject and add the WeaponController component to it.
Drag your weapon model as a child of this GameObject and adjust its position so the weapon's handle aligns with the pivot of the empty GameObject.
Ensure the tip of the weapon points along the Z-axis of the empty GameObject.
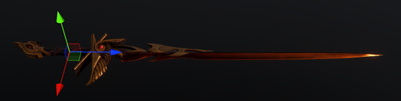
Weapon Settings in WeaponController
-
Select Weapon Type: Specify how the weapon is held by selecting one of the options:
LeftHandRightHandTwoHandedCustom#If the weapon is not designed to held by hands, for example, a cross bow equipped on the forearm, you can select theCustom#type.
-
Set Root Bone for Holding: Assign the bone used for holding the weapon. MCC provides:
- special bones
- WeaponBoneL
- WeaponBoneR Which align with the center of the character’s hand. Alternatively, you can assign any other bone by entering its name.
-
Set Root Bone for Carrying: Assign the bone used for carrying the weapon. MCC provides pre-defined bones like
CarryPointXXX, which are correctly positioned based on the character's body shape. These carry points are soft-connected, meaning they dynamically swing with the character’s movement. You can also assign any custom bone by entering its name.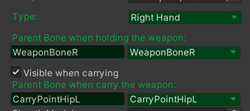
Positioning the Weapon
Click the Position Mode button in the WeaponController inspector to preview how the weapon looks with the character.
Adjust the weapon's position, rotation, and scale as needed.
You can switch between Male and Female characters and set separate positioning for each. For example, you can scale the weapon down for female characters only.
Toggle between Holding and Carrying states to ensure both are correctly positioned.
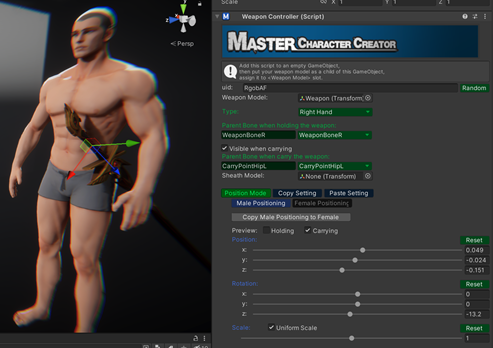
Copying Settings:
Use the Copy XXX Positioning to XXX button to copy the current positioning (Holding or Carrying) between Male and Female characters.
Click Copy Setting to save the current settings to the clipboard. This allows you to paste the settings to similar weapons by clicking Paste Setting in another weapon’s WeaponController.
Saving the Weapon:
Name your weapon GameObject and save it as a prefab.
Equipping Weapons to Characters
Option 1: Drag the weapon prefab into the Weapons slots in the CharacterEntity component.
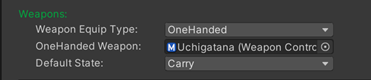
Option 2: Equip weapons programmatically using the provided API calls. Refer to the CharacterEntity API section for details.
Example Code:
public CharacterEntity Player;

public void SwitchWeapon(int _id)
{
    if (!Player.isEquippedWeapon(Weapons[_id].uid)) //Check if the character is already equipped this weapon.
    {
        Player.EquipWeapon(Weapons[_id], Player.GetWeaponState()); //If not, equip it.
        SoundManager.Play2D("EquipOn");
    }
    else
    {
        Player.UnequipWeapon(Weapons[_id].Type); //If it's already equipped, then unequip it.
        SoundManager.Play2D("EquipOff");
    }
}
Switching Weapon States:
Weapons can transition between three states: Hold, Carry, and Hide.

You can set the state directly in the CharacterEntity inspector or change it via API calls. Refer to the CharacterEntity API section for details.
Example Code:
public CharacterEntity Player;

public void SwitchWeaponState(int _state)
{
    Player.SwitchWeaponState((WeaponState)_state);//Switch the state of the equipped weapons
}