Getting-Started
Getting Started
This page gives you the fastest path to a working health bar setup. If you have not imported and configured the package yet, complete Installation first.
Step 1 - Open Health Bar Settings
Navigate to:
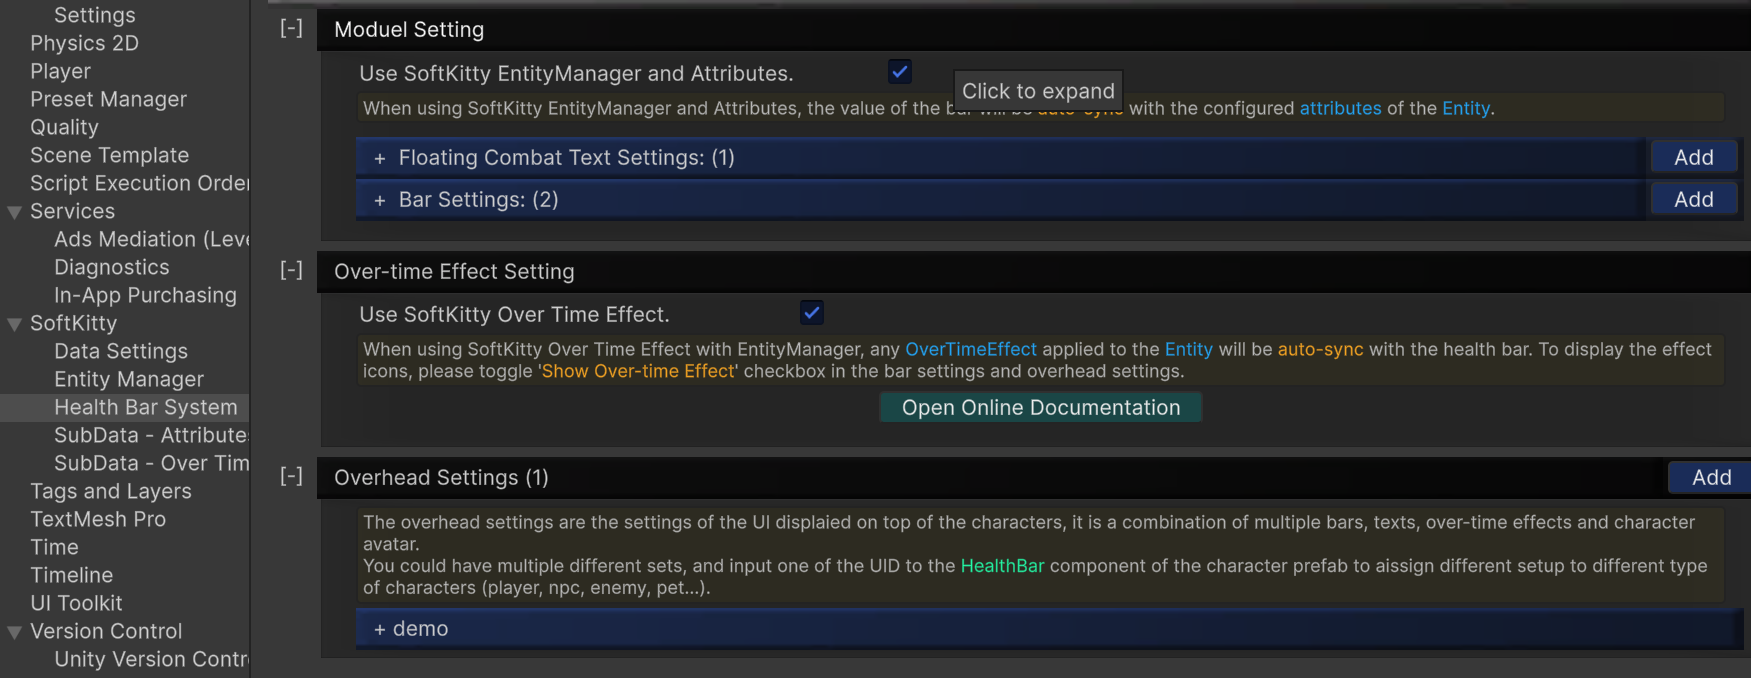
Project Settings > SoftKitty > Health Bar System
You will configure all presets from this panel:
Module SettingFloating Combat Text SettingsBar SettingsOver-time Effect SettingOverhead Settings
Step 2 - Choose Your Runtime Mode
Mode A: Linked to SoftKitty Shared Data
Use this when your character data already comes from EntityManagerObject, AttributeObject, and OverTimeEffectObject.
- Enable
Use SoftKitty EntityManager and AttributesinModule Setting. - Enable
Use SoftKitty Over Time EffectinOver-time Effect Setting. - Configure bar-to-attribute binding in BarSettings.
- Add EntityComponent and HealthBar on the same character object.
See full guide: Using with EntityManager
Mode B: Standalone Manual Values
Use this when you do not want to depend on SoftKitty shared data objects.
- Keep
Use SoftKitty EntityManager and Attributesdisabled. - Keep
Use SoftKitty Over Time Effectdisabled. - Drive values directly from your game code with HealthBar.
Step 3 - Assign and Preview
-
Create one or more bar presets in BarSettings.
- Each preset must have a unique
UID. - Configure value mapping using
Current/Max/Overlay/Overlay Max Value Attribute(only needed in Entity-linked mode).

- Each preset must have a unique
-
Create one or more overhead presets in OverheadSettings.
- Each overhead preset must have a unique
Overhead UID. - Set
Main Bar (idx:0)to reference the bar preset you want to use for the primary bar. - Optionally configure
Sub Barsfor extra layers/resources.
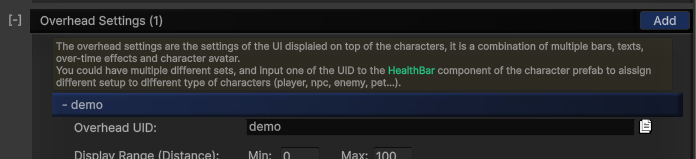
- Each overhead preset must have a unique
-
Ensure there is exactly one HealthBarCanvas in your scene.
HealthBarCanvaslets the system find the target UI Canvas used to render world-space HealthBar elements.
- Add the
Canvascomponent on the same GameObject asHealthBarCanvas. - In
Additional Shader Channels, enableTexCoord1andTexCoord2.
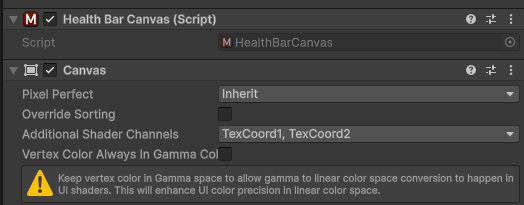
- This allows the shader to receive per-instance data through UV2/UV3 channels and helps avoid creating multiple material instances.
- Add the
-
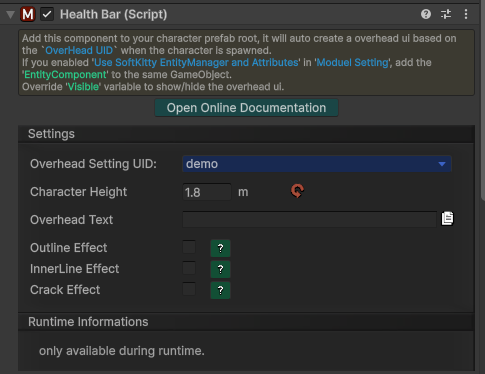
Add HealthBar to each character that should display an overhead/world-space bar.
- Assign the correct
Overhead UIDin the HealthBar component.
- Assign the correct
-
Bind entity data (Entity-linked mode only).
- Add EntityComponent on the same GameObject.
- Select an
Entity UIDfrom your database. - If you are using standalone mode, do NOT add EntityComponent and do NOT enable
Use SoftKitty EntityManager and Attributes.

- Preview in Play Mode
- Entity-linked mode: update the entity
Attributevalues and confirm the bar auto-syncs correctly. - Standalone mode: manually drive values via HealthBar
SetValue(...)calls.
- Entity-linked mode: update the entity
- Validate optional feedback
- Turn on/off
Show Floating Combat TextandShow Over-time Effectin the relevant bar/overhead presets based on your design needs.
- Turn on/off